Makalu
Introduction and folding instructions online and in print

Robert J. Lang’s Makalu (Six Intersecting Pentagons) is an interesting wireframe model and part of his Himalayan Peaks series. Original instructions for the units and how to connect them are available in Origami USA Annual collection 2002.
Assembly tips
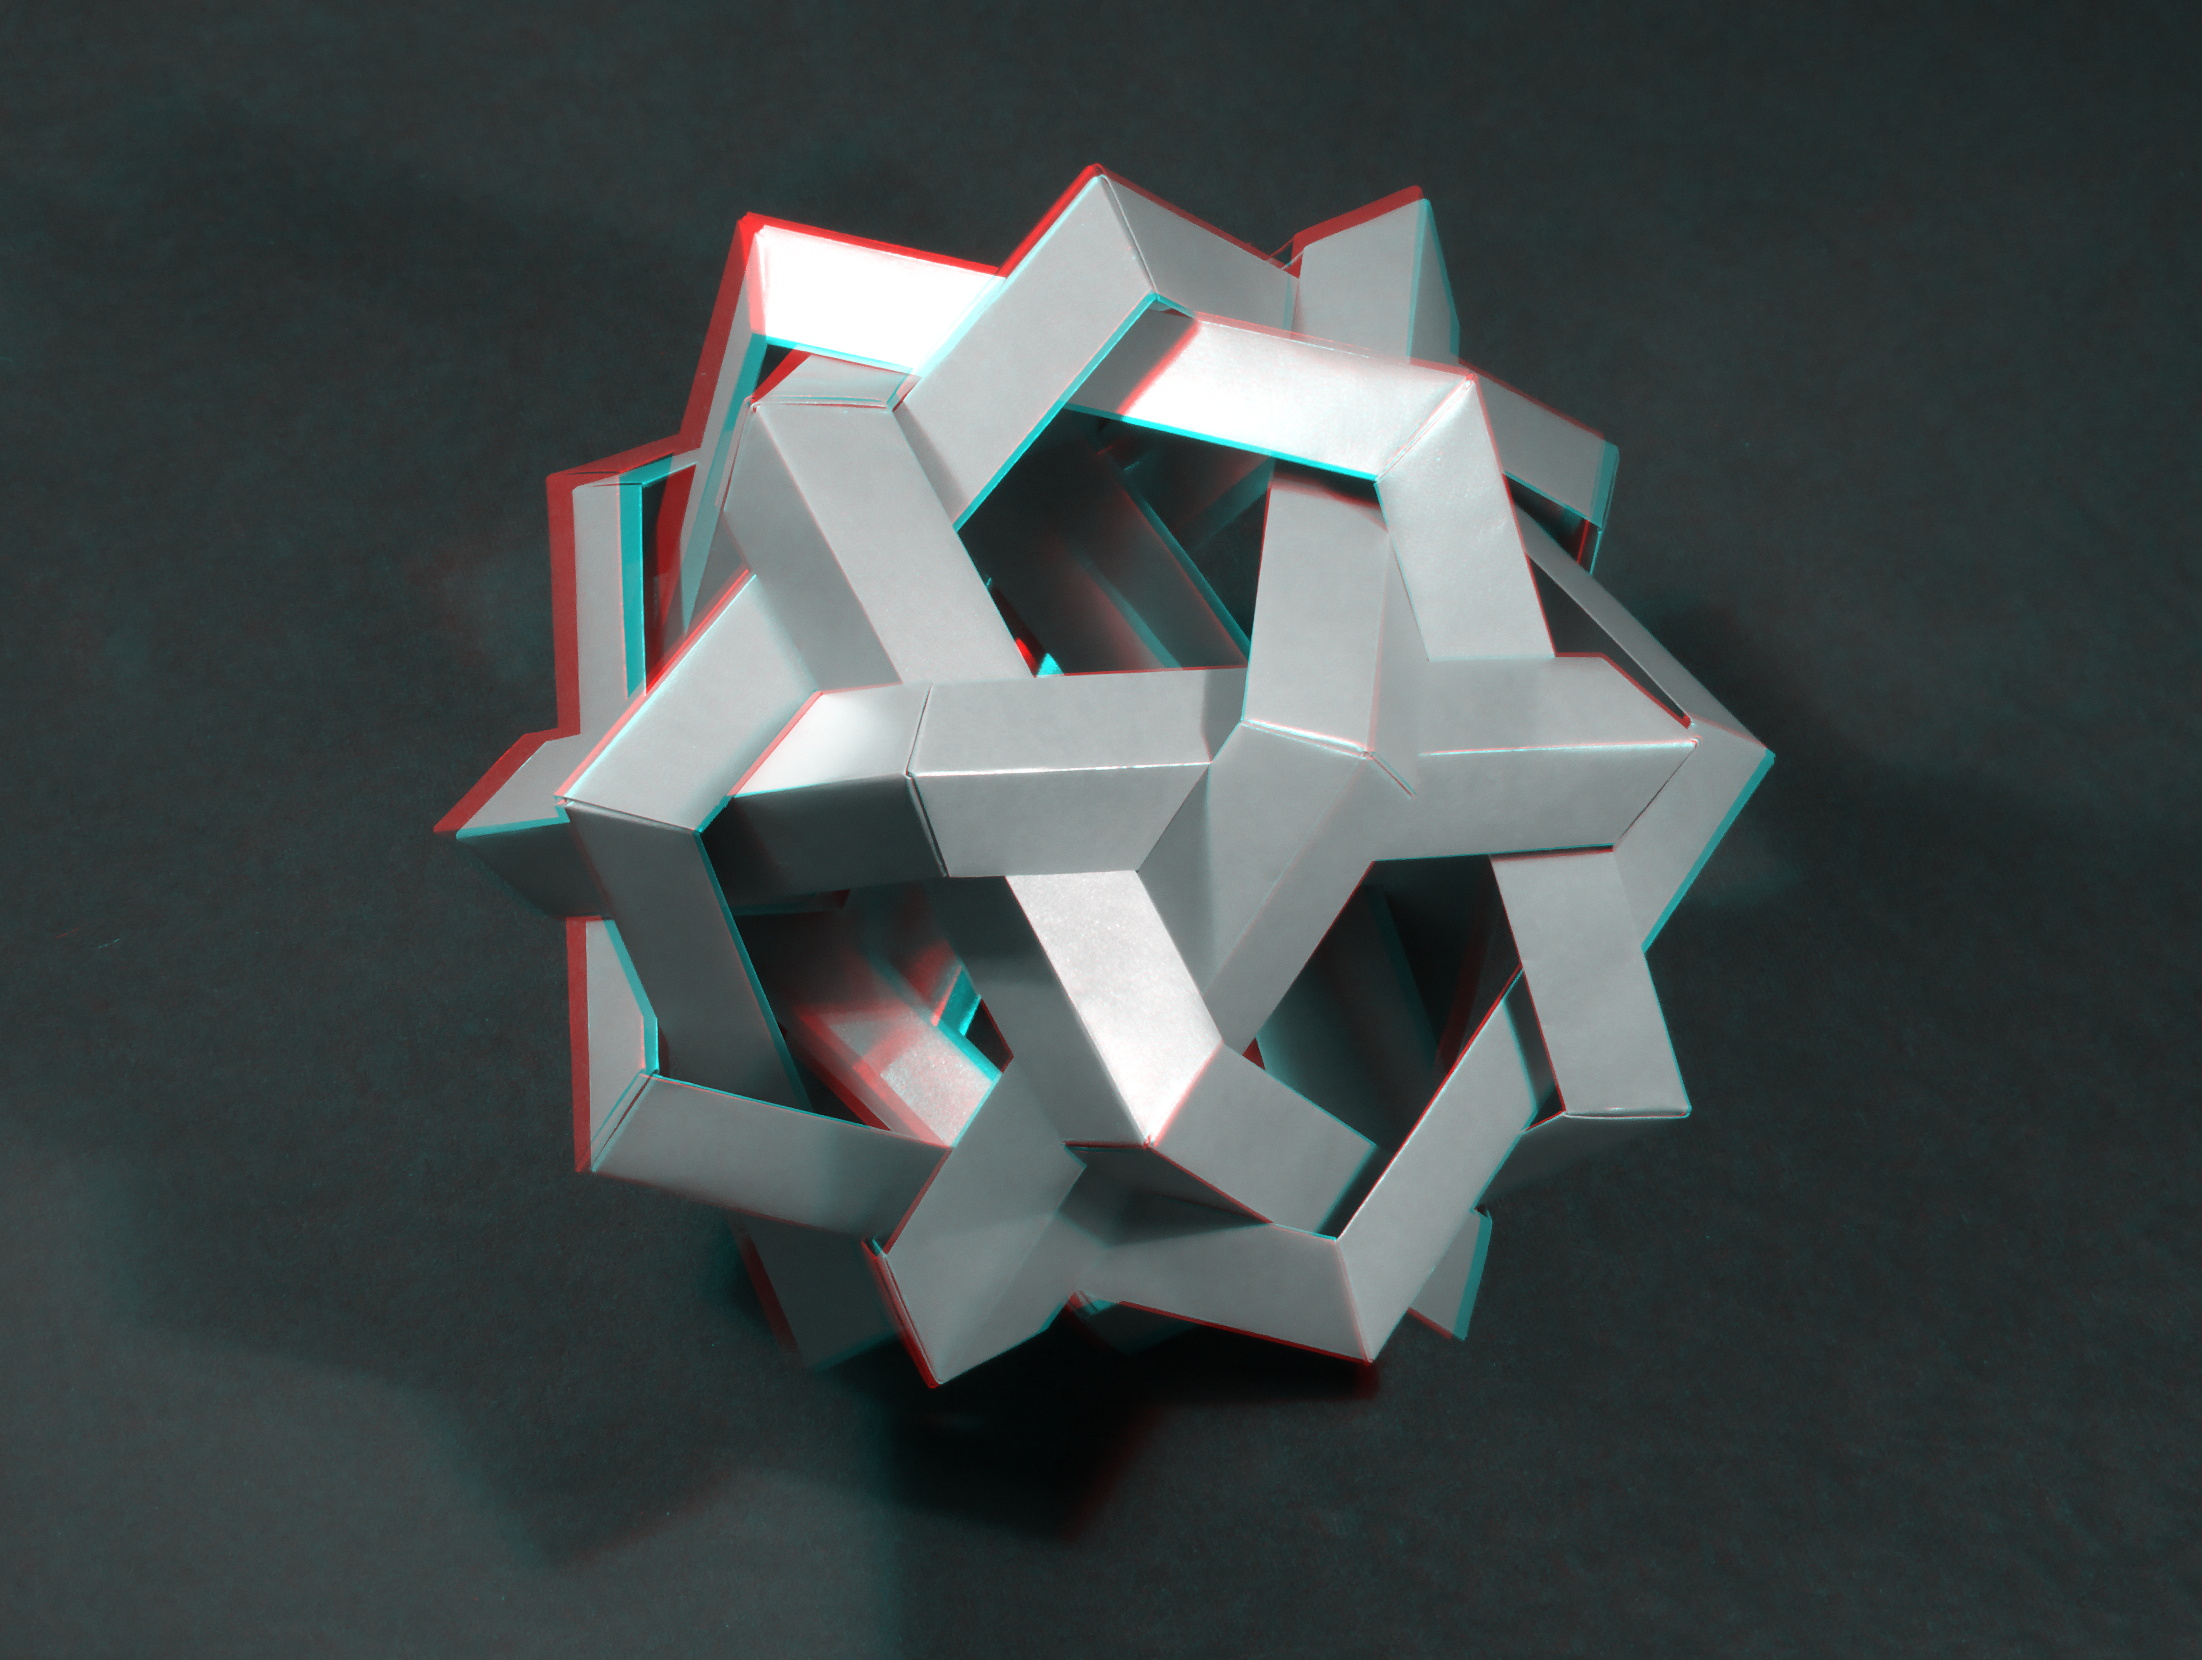
I think the original instructions for joining the units are adequate, but not perfect. I came up with a number of tips not mentioned there which I think can help with assembling the complete model (which is the hard part of making it) once you’ve folded the units. If you already managed to fold the model once, the actual folded Makalu is the best help you can get and much better than any flat pictures or diagrams. If you don’t have a finished model yet, you can use the picture of the finished model found to the right as reference. The second picture is a three-dimensional anaglyph image which can be viewed using red-cyan glasses.
Spolier alert: much of the fun is in coming up with how to connect the units by yourself, so while these tips should reduce the time needed to complete the model, they may also take away much of the fun as well.
- As with Five Intersecting Tetrahedra, understanding the symmetries of the model is key to proper assembly. Each of the pentagonal rings intersects every other ring exactly once. Each vertex of the dodecahedron consists of three units weaved together. Each face consists of five units weaved together. Note the relative location of vertices to edges in the finished model. This model is chiral: there are two versions with different twisting directions, which are each other’s mirror-images.
- Start with three rings and assemble them so that each one intersects each of the other two exactly once. At this stage this is a sufficient condition for proper assembly but after three rings, it is required but not sufficient any more. The three-ring structure is completely loose and the rings will all just lie on the table, unable to hold together any 3D shape.
- Given the three interconnected rings, try to form a single vertex of the docecahedron: a weave of three units, roughly at the half of the units’ lengths. Each of the three units should pass above one of the other two and below the other. The rings will now enclose a roughly spherical space. They are not stable in their positions, meaning you have to hold them all the time or fix them in position with rubber bands. You may need to move some rings around the model from one side to the other in order to get the proper weave order of the rings.
- Now, try to form another such vertex, symmetrically at the other “pole” of the sphere. It does not have to be very precise: just ensure the units overlap each other in the right order.
- Ring 4 is probably the hardest to attach as the three-ring structure you start with is very unstable. I usually attach rings 4-6 by folding the 15 units into 6 two-unit assemblies and leaving 3 units alone. This ring should form another vertex right next to the one you created initially, and another one, symmetrically at the back. Try to first insert the two-unit elements into proper places, then connect them to each other, then attach the last, individual unit of the ring. The 4-ring assembly is tight enough for it to be able to stand on its own, but it is still fragile and can easily succumb to the table with the rings still connected but not placed properly in 3D any more.
- Another important symmetry which helps in getting the right arrangement of the rings at this stage is the following. Look at one pentagonal face of the finished model. Each of the edges that make up the pentagon lies below one of the other edges, above another one, and it also passes above one more unit which does not belong to this pentagon.
- And yet another one which helps in reordering the rings if you notice that “something is wrong” with your assembly: when you take any two non-neighboring edges of a single pentagonal face, there will be a ring in the model such that they both lie above that ring.
- Add the first two-unit segment of the fifth ring (at this stage you should see where it should go based on the 4 rings already there and knowing the symmetries of the model). Once you do this, the rings will be locked and should not fall apart any more which makes further work much easier.
- Add the rest of the fifth ring.
- Add the sixth ring whose position will now be abvious, and you’re done.
Comments